Surveys

Learn how to connect your form builder to Zapier and automate repetitive tasks with ease. This step-by-step guide covers setup, field mapping, testing, common mistakes, and best practices to help you create reliable workflows, improve response times, and keep your business data synchronized.
Ovoform Team
August 20, 2026
A potential customer requests a demo through your website at 9:00 AM. Instead of reaching your sales team instantly, the request sits in an inbox until after lunch. By then, the prospect has already booked a demo with a competitor. That's the kind of delay workflow automation is designed to eliminate.
For many businesses, that's where manual work begins. Teams copy data into spreadsheets, update CRMs, notify colleagues, send confirmation emails, and create follow-up tasks. These repetitive processes take time, increase the risk of human error, and slow down customer response times.
A Zapier form integration helps eliminate those manual steps by automatically moving form submissions to the tools your business already uses. Instead of spending time on administrative work, your team can focus on engaging leads, onboarding customers, or resolving support requests.
Whether you're managing demo requests, booking appointments, collecting event registrations, or qualifying leads, connecting your form builder to Zapier creates a more efficient workflow without requiring custom development.
In this guide, you'll learn how Zapier works with online forms, how to connect your form builder step by step, common mistakes to avoid, and best practices for building reliable workflow automation that scales with your business.
Forms are often the starting point of a customer's journey. A visitor requests a demo, books a consultation, signs up for a free trial, or submits a support request. What happens next influences both customer experience and operational efficiency.
In many growing teams, form submissions first land in a shared inbox. Someone then copies the information into a CRM, tags the right sales representative, and sends a confirmation email. Each step only takes a few minutes, but together they create delays and increase the chance of missing qualified leads.
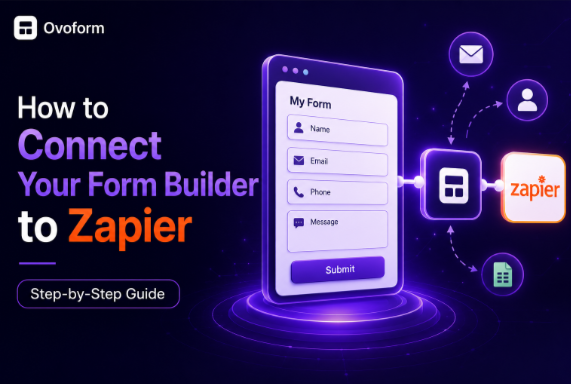
Integrating your forms with Zapier allows businesses to automate these repetitive processes. A single submission can instantly create a CRM contact, notify the sales team, generate a project task, send a confirmation email, and log information in a spreadsheet, all without manual intervention.
The benefits extend beyond productivity:
Many organizations begin with a single automation and gradually expand their workflows as they identify repetitive tasks. Starting small makes it easier to monitor performance, troubleshoot issues, and build reliable processes over time.
Faster response times improve customer satisfaction.
Consistent data reduces reporting errors.
Automated workflows help teams scale without increasing administrative work.
Standardized processes improve collaboration across departments.
For SaaS companies and growing businesses, workflow automation isn't simply about saving time—it's about creating a smoother customer journey from the very first interaction.
Before setting up automation, it's useful to understand the basic workflow.
Most businesses don't need dozens of automations to see results. Even one well-designed workflow, such as sending every demo request directly to your CRM, can remove hours of repetitive work each week.
Trigger – the event that starts an automation.
Action – the task performed after the trigger occurs.
When someone submits your online form, the submission becomes the trigger. Zapier then performs one or more predefined actions automatically.
For example:
Form Submission | Automated Action |
Demo Request | Create CRM lead |
Booking Form | Create calendar event |
Send Slack notification | |
Support Form | Create help desk ticket |
Save applicant to HR system |
This simple workflow removes repetitive manual work while keeping information synchronized across your business tools.
Business impact: Teams spend less time transferring data and more time serving customers.
Customer impact: Faster confirmations and quicker responses improve trust.
Expert Tip: Keep your automation focused on a specific business outcome. Trying to automate too many unrelated actions in one workflow can make troubleshooting more difficult later.
Before creating an automation, review your form carefully.
Before adding another field, ask yourself:
• Does my team actually need this information right now?
• Will this field help the next step in the customer journey?
• Could removing it improve completion rates?
Every additional field increases the likelihood that someone abandons the form. Collect only the information needed for the next step in the customer journey.
Are field names descriptive?
Is conditional logic configured correctly?
Are unnecessary questions removed?
A well-designed form produces cleaner data, making automation much more reliable.
Example
A SaaS company offering free trials collects:
Name
Company
Business Email
Team Size
Primary Use Case
This information helps qualify leads before they enter the CRM.
Business impact
We often see teams connect their forms to a CRM only to discover that inconsistent field names create duplicate contacts. Spending a few extra minutes standardizing your form fields before building the automation saves hours of cleanup later.
Customer impact
Short, relevant forms increase completion rates and reduce abandonment.
Trade-off
Collecting more information may help sales teams but longer forms often reduce conversion rates. Prioritize only the information needed for the next step in the customer journey.
Expert Tip: If you're using Ovoform, conditional logic makes it easy to ask additional questions only when they're relevant. That keeps forms shorter while still collecting the information your sales team needs.
Once your form is ready, connect it to Zapier by authorizing your accounts.
After authentication, select the form you want to automate. Zapier will retrieve available fields so they can be mapped during later steps. If you're using Ovoform, your form fields are automatically available for mapping, making setup faster and reducing configuration mistakes.
The first connection usually takes only a minute. After that, Zapier remembers your account unless you change your password or reconnect the integration.
Business impact
A stable connection means every form submission reaches your CRM, email platform, or help desk without manual intervention—even during busy periods.
Customer impact
Customers receive confirmation emails and follow-up messages without unnecessary delays, giving them confidence that their request has been received and is being processed.
Implementation advice
Use dedicated business accounts rather than personal accounts whenever possible to simplify long-term management.
Most form workflows begin with the trigger:
New Form Submission
Whenever someone submits the selected form, Zapier starts the automation.
Different businesses may use different triggers depending on their workflow, but the goal remains the same—start automation immediately after meaningful customer activity.
Example
Imagine a SaaS startup receiving 40 demo requests every day.
Without automation, someone manually copies every lead into the CRM.
With Zapier, every submission instantly creates a CRM contact, assigns the correct sales representative, and sends a personalized confirmation email.
Each submission automatically:
Creates a CRM contact.
Sends a Slack notification.
Adds the lead to a sales spreadsheet.
No manual work is required.
Business impact
Every demo request reaches the sales team within seconds instead of sitting in an inbox. Faster follow-ups mean sales representatives can contact prospects while their interest is still high.
Customer impact
Prospective clients receive faster communication, creating a more professional first impression.
Field mapping tells Zapier where each piece of submitted information should go.
For example:
Form Field | Destination |
Full Name | CRM Contact Name |
CRM Email | |
Company | Company Record |
Phone Number | CRM Phone |
Message | Notes |
Accurate mapping is essential for maintaining clean customer records. Because Ovoform keeps field names consistent, it's easier to match form fields with CRM properties and other connected applications.
Common mistake
One of the most common setup errors is mapping the Company Name field to the contact's name or sending phone numbers into the Notes field. The automation still works, but your CRM quickly fills with inconsistent records. Always review every mapped field before publishing.
Expert Tip: If your CRM treats email addresses as unique identifiers, always test duplicate submissions before going live. Otherwise, your workflow may overwrite existing contacts instead of creating new ones.
Testing confirms that every action performs as expected.
Submit a sample form and verify:
CRM records are created correctly.
Emails contain the correct information.
Notifications reach the right team.
Calendar events include accurate dates.
No fields are left blank.
Fixing issues before launch prevents future operational problems.
If your test doesn't work
Check that your Zapier account is still connected.
Refresh form fields if you recently edited your form.
Confirm every required field is mapped.
Review Zapier's task history for errors.
Run another test before publishing.
Business impact
Finding mapping issues before launch prevents duplicate contacts, incorrect CRM records, and hours of manual cleanup later.
Customer impact
Customers receive accurate confirmations and faster service without unnecessary delays.
Once your test runs successfully, publish your Zap. From this point, every new form submission will trigger the actions you've configured.
Before going live, confirm that:
Required fields are mapped correctly.
Team members have access to connected tools.
Email notifications use the correct recipients.
Duplicate records are handled appropriately.
Business impact: Once the workflow is live, routine tasks happen automatically instead of relying on manual updates. Sales teams can focus on speaking with prospects while operations teams spend less time correcting data or repeating administrative work.
Customer impact: Customers receive prompt confirmations and faster follow-ups, creating a smoother experience.
Expert Tip: Start with a single automation before adding more actions. It's easier to monitor, troubleshoot, and optimize one reliable workflow than a complex one with multiple dependencies.
Automation isn't a one-time task. Business processes evolve, forms change, and integrations may need updates.
Regularly review your workflows to:
Check for failed tasks or errors.
Update field mappings if your form changes.
Remove outdated automations.
Improve lead routing as your sales process evolves.
Analyze whether automation is reducing response times. If you're using Ovoform, reviewing submission trends alongside your workflows can help identify opportunities to improve both form performance and automation.
For example, if your demo request form starts collecting a new "Company Size" field, update your CRM mapping so sales teams can prioritize enterprise leads effectively.
Business impact: As new forms, tools, and business processes are introduced, regular reviews help ensure every workflow continues working as expected. Small updates today can prevent broken automations and missed leads later.
Customer impact: Accurate data and faster responses improve customer confidence and reduce friction.
Mistake | Why It Happens | Business Impact | How to Fix It |
Using long, unnecessary forms | Trying to collect too much information | Lower completion rates | Ask only for information needed at that stage. |
Skipping workflow testing | Rushing to launch | Incorrect data and failed automations | Test with multiple sample submissions before publishing. |
Poor field mapping | Similar field names cause confusion | Duplicate or incomplete CRM records | Review every mapped field carefully. |
Ignoring failed tasks | No ongoing monitoring | Missed leads and delayed follow-ups | Check workflow history regularly and resolve errors quickly. |
Automating every process | Overcomplicated workflows | Difficult maintenance | Automate high-impact, repetitive tasks first. |
Different forms serve different purposes. A demo request form, support request, and event registration form shouldn't ask the same questions.
Collect only the information needed for the next step in the customer's journey. This reduces form abandonment while maintaining data quality.
Conditional logic displays additional questions only when they're relevant.
For example, if a user selects Enterprise Plan, you can ask for team size and implementation requirements. Smaller businesses won't see those questions, keeping the experience simple.
Consistent field names, dropdown options, and validation rules improve reporting and CRM accuracy.
For example, Consistent naming conventions also make reporting more accurate. For example, using "United States" everywhere instead of mixing "USA," "US," and "United States" prevents duplicate reporting categories.
As your business grows, your workflows should evolve too.
Quarterly reviews help you:
Remove outdated automations.
Improve lead qualification.
Add new integrations.
Adapt to changes in your sales or support process.
Expert Tip: Measure success using business outcomes, such as response time, lead quality, or reduced manual effort, not simply the number of automations you've created.
In many growing teams, automations are created by different people over time. A quarterly review helps identify duplicate workflows, remove outdated integrations, and simplify ongoing maintenance.
Before publishing your workflow, make sure you've completed the following:
Keep forms concise and relevant.
Use clear field names.
Apply conditional logic where appropriate.
Validate required fields.
Authenticate connected accounts securely.
Map every field correctly.
Test with multiple sample submissions.
Confirm notifications reach the correct teams.
Monitor workflow performance regularly.
Review and optimize automations as business needs change.
Connecting your form builder to Zapier can be a practical way to reduce repetitive work and create more efficient business processes.
Instead of manually transferring information between applications, your team can automate routine actions such as CRM updates, notifications, emails, task creation, and data logging.
The most effective workflows start with well-designed forms, accurate field mapping, thoughtful automation, and regular monitoring.
You don't need to automate everything at once. Start with one repetitive process, test it thoroughly, monitor the results, and expand your workflow as your business needs grow.
If you're looking for a form builder that combines flexible forms, Zapier integration, analytics, and workflow automation, Ovoform can help you build connected workflows without writing custom code.
Create surveys, FAQs, and feedback forms in minutes with Ovoform — no code required.
Get started freeStart building with Ovoform today — free forever, no credit card required.
Get Started For Free